peanut butter & chocolate pudding pie

peanut butter & chocolate pudding pie

i have the best friends in the world. -no, seriously. i know you think yours are pretty awesome, but mine are the BEST. i mean, the kind of friends that come from San Francisco to see you. the kind that spend the last change of their money on a food co-op membership for your birthday. the kind that secretly remember to send you a sweet and sappy card in the mail across the country (seriously spm, i needed it so badly!). the kind that buy you fancy gin, just because they want you to experience new flavors. the kind that spend a sunday night at a late night bbq just to catch up… mom & dad, you are included in this. thanks for putting up with my craziness! you are all amazing, and i want to thank everyone for making last weekend an incredible party. i don’t care if it was to see emily, or for my birthday, what a great day.

by the way, this is the last birthday that starts with a “2” for me.., so next year, i want an over the hill party. can you hire a grim reaper to show up instead of a clown? anyone know?

more loco than four loco

most of our parties end up in a bonfire. when we ran out of logs to burn, we ended up burning the famous “mural doors” that came with the house. -they had wisteria and fairies painted on them. burning these awful things…. ughh…. very theraputic.

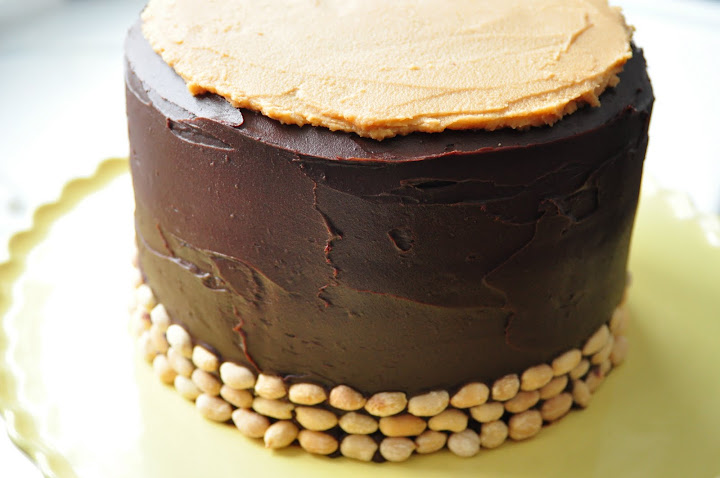
i made this peanut butter & chocolate pudding pie for my birthday this weekend, and it was killer. we all know chocolate and peanut butter will make my heart melt, but this was surprisingly delicious. i whipped it together hours before the party, just winging it as i went along. why is it that the things i throw together turn out better than those that are calculated?

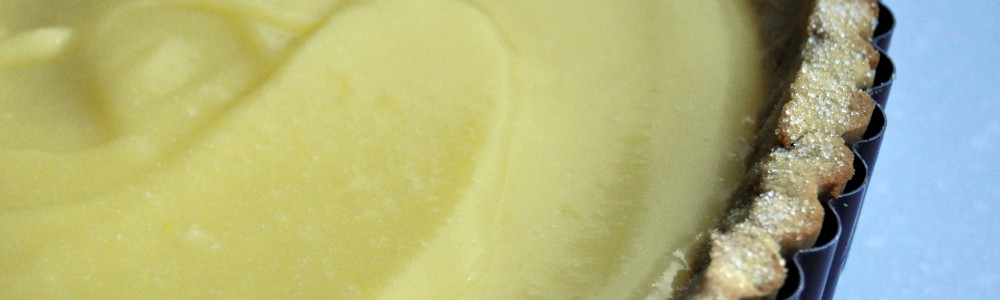
this pie is naturally sweetened with honey, not sugar, which is always amazing with peanut butter. the peanut cookie crust is lightly salted, which is a nice contrast with the sweetness that comes through the honeyed crust and, the filling of the pie. the crust is a little crumbly, a little crunchy, and super dreamy. it held the filling of the pie well. i was surprised at how well the filling set up, because the arrowroot worked like a charm. i am always a little skeptical with puddings, but this firmed up perfectly, even the peanut butter pudding. you could use cornstarch if you don’t have arrowroot powder.

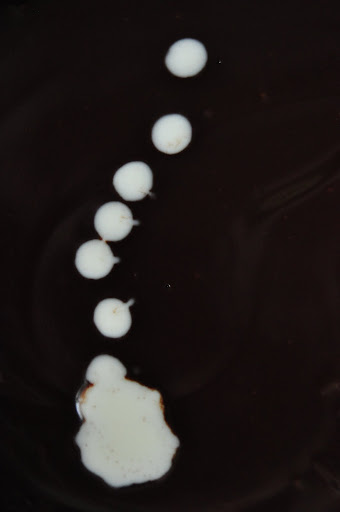
yes, it did turn out a little lumpy. i was being impatient.

lesson learned: let it cool for 3 minutes before adding arrowroot powder.

still delicious and silky.

i can’t say much more about this pie other than that it is everything you imagine it will be.

lumpy love

favorite pie? yes.

make again? duh.

peanut butter & chocolate pudding pie

for the crust:

3 cups roasted & salted peanuts

1/4 cup peanut flour or coconut flour

1/2 tsp sea salt

1/2 tsp baking soda

4 tbsp oil

1/4 cup honey

2 tbsp vanilla extract

method:

preheat oven to 350f.

combine vanilla, oil and honey in a bowl and set aside. grind peanuts in food processor until they make a crumbly meal. add in dry ingredients and pulse a few times. add wet ingredients, and mix in processor until thick dough forms. don’t over process, or it will turn into a liquidy peanut butter.

press dough into spring-form pan, or something where the bottom drops out. bake for 8-10 minutes, until it smells like a giant amazing cookie. it should appear golden brown, not too dark, or it will taste burnt. cool for an hour or more before filling.

chocolate pudding:

1 can coconut milk (14oz)

pinch of sea salt

3 tbsp honey

1 tbsp vanilla extract

1 cup dark chocolate chips

method: in saucepan, heat coconut milk and salt over medium. once it comes to gentle boil, remove from heat for 3 minutes. now sift in arrowroot powder and whisk vigorously. i like to use a hand mixer for the arrowroot step. it will thicken, and should be relatively smooth. whisk in honey and vanilla.

once combined, whisk in chocolate until it melts. whisk, whisk, whisk, then chill for an hour or so, along with peanut butter filling.

peanut butter pudding:

1 can coconut milk (14oz)

pinch of salt

3 tbsp arrowroot powder

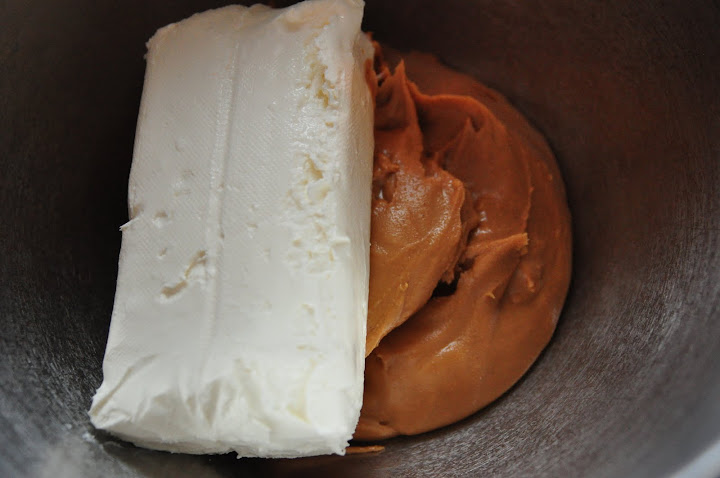
1 cup smooth, no stir, natural peanut butter

1 tsp vanilla

method: in saucepan, heat coconut milk and salt over medium. once it comes to gentle boil, remove from heat for 3 minutes. now sift in arrowroot powder and whisk vigorously, again with a mixer if you have one. it will thicken, and should be relatively smooth. whisk in honey and vanilla.

finally, whisk in peanut butter until well combined and smooth. whisk, whisk, whisk, then chill for an hour or so.

chocolate pudding and peanut butter filling should cool at the same time.

to assemble:

fill pie by dropping heaping spoonful of pudding onto cooled shell. use a knife blade to swirl and marble. chill for at least 2 hours before serving. keep this pie cold, slice when cold, and serve cold.

i fully intended on serving this pie with bananas ice cream, but totally forgot by the time i was slicing, but i do know it would be an awesome addition.

ps, don’t forget about this:

click here to watch something wonderful!

chocolate cake with peanut butter mousse filling

peanut butter army

my dad’s 60th surprise party was last weekend.

as i mentioned last week, thoughts of peanut butter tie me to memories of mornings with my dad. the peanut butter and honey toast, the peanut butter and jelly toast, peanut butter and jam crackers for a snack… i even remember dipping carrots into peanut butter as a snack when i was young. an inexpensive and delicious protein source, peanut butter provokes childhood memories for many, i’m sure. it seemed obvious to use peanut butter as a filling for a cake for my father, whom i look up to, and wish a million of the best things in life he has ever wanted!

this was a 3 layer cake, the top and bottom chocolate, and the center was vanilla. filled with peanut butter mousse, frosted with chocolate, and trimmed with salty peanuts, this cake was tall and incredible. thin slices filled us up just right and left us wanting more. -that’s how you know something is great. you want a little more.

i knew i was becoming dissatisfied with my usual chocolate cake recipe. i wanted something much more rich and fully flavored. i knew i wanted to find a recipe that used milk and coffee to bring in rich & bold flavors and a super moist but still cakey crumb. seems the one i found managed to blow my mind. this is my new go-to chocolate cake recipe. no questions asked. the chocolate mousse recipe came from the same gal. i used my usual vanilla cake recipe for the center layer. i found that this vanilla sponge cut the richness of the cake quite well, so don’t skip it. i managed to find a wonderful chocolate frosting recipe in this month’s bon appetit magazine. again, i loved it. -smooth, rich, creamy, and very deep. the brown sugar gave this frosting so much body. i really wish i could have gotten a picture of the sliced cake. it was beautiful and tall, and the cake not too fudgy looking.

i  would like to add that the most important reason for my baking and cooking so often is that i find such beauty in it. i find it to be intimately therapeutic no matter how frustrating the experience. i enjoy being surrounded by the melting chocolate, sizzling butter, the fluffy egg whites, the frying bacon, and i think it is a very important experience to be saturated in. as you can see, this was a very fulfilling cake for me to bake in that respect.

enough talk, let’s bake.

for the chocolate cakes

this recipe makes one layer, so double it if you are doing a 2 layer cake like i did.

adapted from the wholesome home

1/2 cup butter at room temp
1 cup sugar, minus a few tbsp
5 eggs at room temperature
1/2 tsp vanilla extract
1 cup coconut flour, sifted
1/2 cup unsweetened cocoa powder, sifted
3/4 tsp baking soda
1/4 tsp baking powder
1/2 tsp salt
1/2 cup milk
1/4 cup strong brewed coffee at room temp

method: prep 8″ round cake pans using butter and lining the bottom with parchment round. preheat oven to 350f.

combine coconut flour, cocoa, salt, baking powder, and baking soda in a large bowl. set aside.

crack eggs open and put in a bowl with a pouring spout. set aside.

combine milk, vanilla and coffee in cup with pouring spout. set aside.

using stand mixer, cream butter and sugar until fluffy. yum!

after just a few minutes, turn on low-speed and add one egg at a time to the butter and sugar. plop. plop. until all the eggs are gone and well combined.

next, scoop about a cup of the flour mixture into the batter, then pour 1/4 of the milk mixture into the bowl. continue alternating additions until both are mixed into the batter. stop mixer and scrape the bottom and sides of the bowl to reincorporate any butter or other stuff that may be sticking to the bowl. mix until evenly combined. pour into prepped pan.

bake for 35 minutes or so. the center will be just set and no longer jiggly. do not over bake. please, for the love of all things good. cool in pan for half an hour or so. use a knife to loosen edges from pan and cool completely on rack.

now bake center layer!

for the single honey vanilla cake

1/2 cup coconut flour, sifted

1/4 tsp salt

1/4 tsp baking soda

5 eggs

1/2 cup olive oil

1/2 cup honey

1 tsp vanilla extract

method: prep 1 8″ round cake pan by greasing it and lining the bottom with parchment paper.

preheat oven to 350f.

combine dry ingredients together and set aside.

using mixer, combine wet ingredients until they are really well combined and even a little foamy.

on low-speed, mix dry ingredients into the wet ingredients. batter will thicken only slightly and will resemble a pancake batter.

pour into prepped pan and bake for 25-30 minutes. cool cake in pan for at least half an hour before

loosening the edges with a knife and cooling completely on rack.


now make the frosting!

cocoa frosting

adapted from bon appetit magazine, feb 2011

5 tbsp unsalted butter

2/3 cup light or golden brown sugar, packed

1/2 cup unsweetened cocoa powder

1/2 cup heavy whipping cream

1 tsp vanilla extract

1/4 tsp salt

method: melt butter over medium heat. stir in sugar, cocoa, and salt. gradually stir in cream. continue to stir over medium heat until mixture is hot and begins to simmer around edges. remove from heat and stir in vanilla. stir off heat for a minute or two. put a lid on it. stick in refrigerator for 1 1/2 hrs, stirring occasionally.

after chilled, let stand at room temp for another hour, again, stirring occasionally.

while frosting is sitting at room temp, it’s time to:


make the peanut butter mousse!

adapted from whisk kid

1 block (8 oz) cream cheese

1 jar (1 1/2 cups) creamy peanut butter, the shelf stable kind

1 cup sifted powdered sugar

1/2 cup heavy whipping cream

method: using hand mixer, whip the cream in a well chilled bowl until it is super fluffy. don’t over do it or you will have butter. set aside.

in a separate bowl, using hand mixer, blend peanut butter with the cream cheese until well combined. add sugar and mix on low-speed until it’s completely blended.

now gently fold about half of the whipped cream into the peanut butter. once it appears almost combined, fold in the other half. careful not to deflate the cream.

now put it all together!

put one of the chocolate cake layers on your serving plate. spread with 1/3 of the peanut butter mousse.

place the honey vanilla cake on top of that, gently pressing down into the filling, and top that with another 1/3 of the mousse.

place the final chocolate cake on top of the vanilla cake, pressing into the filling, and reserve the rest of the mousse to finish the cake with.

scrape the peanut butter mousse from the edges of the cake to be sure the filling is flush with the cake layers.

now gently spread chocolate frosting over the cake, frosting the sides of the cake first. careful not to smear the mousse out of the sides! after entire cake is frosted with chocolate frosting, throw the peanut butter mousse on top and spread.

decorate with peanuts if you wish.

keep cake at room temp. the chocolate will get hard and sticky if you try to keep it cold. the cake keeps for a few days at a cool room temp and serves, like, 35 people. so eat huge slices or have a huge party.

as a side note on this cake, brian and i took a spare slice home with us from my parent’s a few days ago. we went out to dinner that night, and decided not to buy dessert. instead, we ate our cake promptly when we got back to the car. i may have borrowed the restaurant’s fork to do this.

hi, my name is liz, and i have a problem.

almond coconut cake

i put myself in charge of making a birthday cake for my friend, jack. he was turning 30 and his lovely girlfriend, kady, wanted to throw him a surprise birthday party. she's so cute. jack is less than a fan of dairy, so i had to get rid of the usual pound and a half of butter and cup of whole milk i typically put into a birthday cake.i made my favorite cake recipe, but subbed in coconut butter for the dairy butter, and used coconut milk to replace the cow's milk. the results? maybe better than the dairy based cake. the almond flavor came through very clean and uninhibited by the usual butter flavor. the cake came out quite a bit less brown than usual. coconut butter doesn't have as high a smoke point as animal butter, so the cake stayed very blond. coconut butter is also pretty neutral in flavor when you bake with it, so the flavor didn't come through so strongly, which i feared it would take over the whole cake. jack is also somewhat of a nature appreciator, going on mountain hikes and so forth. -so i made a nice outdoor scene, going against my ideas of making a raunchy, rudely decorated cake. -and believe me, i had some real nasty ideas.i used my collection of plastic cake decorations to create the outdoor scene. i made rocks (or deer poops, as brian calls them) out of almonds that i rolled in melted chocolate, then in cocoa and sea salt. i ate about 15 of them as i was waiting for them to cool, so i had to make more.., otherwise, this would have been a fast (and tasty) confection. i created snow with coconut, very creative, i know.

this cake would make a wonderful contribution to a holiday table, given that none of your guests are allergic to nuts. in that case, they would probably be offended that you are trying to kill them. you could always make this grain free chocolate cake with peanut butter ridiculous, that contains no nuts, unless you sneak them in to see just HOW allergic your guests are to nuts….. don’t do that. but do remember to begin the argument that peanuts are NOT nuts. holidays are great.

this recipe makes a 2 layer cake.

for the cake

ingredients:

1 1/2 cups sugar

1 1/3 cup room temperature coconut oil

4 cups almond flour

1 cup coconut flour

1 tsp salt

1 1/2 tbsp baking powder

8 eggs at room temp

1 cup coconut milk

2 tbsp vanilla

optional 1/4 tsp almond extract

method:

preheat oven to 350f, position racks in center of oven. prep 2 round 8″ cake pans with parchment rounds and nice coating of oil.

begin by creaming coconut oil and sugar with electric mixer. once combined and fluffy, add coconut milk, vanilla, and almond extract (if using it) at a low-speed, until it is all wet and combined. add eggs, a few at a time, and let it slowly mix.

combine all dry ingredients together.

add dry ingredients into wet ingredients.

scrape batter from the sides of the bowl and continue to mix.

pour batter evenly into 2 cake pans, and bake for 35 minutes or so. watch carefully as nuts burn quickly.

let them cool for a bit before loosening edges from pans and inverting onto cooling racks. these cakes are best served the day after baking. time to dress up the cakes!

for the frosting

ingredients:

1 cup dark chocolate chips

1/2 cup olive oil

2 tbsp honey (or agave nectar)

1 tbsp vanilla extract

pinch of salt

method:

slowly melt olive oil and chocolate in pot or mixing bowl over very low heat. i like to use my deep kitchen aid bowl for this.

stir, stir, stir.

when chips are melted, add honey, vanilla, and salt. once smooth and well combined, remove from heat.

stick bowl into freezer for 15 minutes. if it still looks shiny and drizzly and runny, stick it back into freezer for 10 minute increments until it no longer looks glossy. it should look dull and somewhat firm, but not hard. *if it gets hard, let it sit at room temp for a few minutes before you continue.

with mixer (hand blender works best here), fluff it. yes, it will turn into frosting, just have faith. it took a good 15 minutes or so of whipping with the hand mixer for this to turn into frosting for me. if it has been 15 minutes and the mixture is turning warm, stick into the freezer for a few minutes and try again.

layer frosting onto one of the cakes. place other cake on top, and continue to cover cake in frosting. it is easiest to frost this cake on the warm side of room temp. the frosting will stiffen up quite a bit if your kitchen is particularly cold. i like to spread it when it is soft and whippy.

throw some coconut and pretty decorations on top. light a candle.

happy birthday, jack! don’t fall down and break any of your old bones!

emma apple orchard and 3 recipes


my bestie emma was in town from san francisco last week. what a dream. she was around for about 2 weeks, and it felt like 2 hours. i can’t explain the pure grief i went through when it was time for her to go back to san francisco. it was a real loss for me. she brings such bright light and sweet joy to everyone’s life that she passes into. thanks for all of the time you spent with me, emma!

to make the most of our time together, the awesome friend trio, erin, emma, and myself, made a visit to the local apple orchard. in my mind, i’ll forever associate autumn with trips to the apple orchard or pumpkin patch with emily. it’s sort of her “thing”. it’s not officially autumn until you make a trip to pick apples, you know. we stuffed ourselves on apples. we bought half a bushel, and that is a lot of apples. we climbed trees, threw apples at each other, and taste tested any apple we could get our hands on.

we had a great dinner party afterward, to get rid of a few apples. we had apple and spinach stuffed pork tenderloin, which was super tasty. i love pork and apples. serious love. pork tenderloin is particularly easy to entertain with. (since we were cooking for so many, i made 3 tenderloins. i will reduce the recipe to 4 servings for practicality.) i pounded them out flat, stuffed them, tied ’em up, and let them marinate for a few hours. brian threw them on the grill for me, and they were finished in about 30 minutes. we also had butternut squash with apple smoked bacon and toasted walnuts. i am madly in love with this combination. i will make it our official fall side dish. for desert, we gobbled up an apple upside down cake, which turned out pretty great.

we had a truth or dare bonfire after dinner, so the rest of the night was a little foggy. i just know that there was wine. lots and lots of wine.

here are the recipes!


apples and rosemary


spinach and apple stuffed pork tenderloin

serves 4

ingredients

1 pork tenderloin, about 1 lb

1 apple, thinly sliced

1 cup spinach

few sprigs of trimmed rosemary, chopped (maybe a tablespoon or more)

1/4 cup or so apple cider vinegar

pepper

salt (after the pork is finished cooking!)

poultry string, 4 pieces cut into 6″ strands, to tie up the porkie

meat mallet

method:

on a clean counter top or cutting board, pound the tenderloin until it is about half an inch thick. it may take 10 minutes or so of a good beating, but it is possible. try to get the entire piece of meat uniform in thickness.


all rolled up


careful you don’t pound through anywhere.

pour half the vinegar over the meat. sprinkle the rosemary and pepper over the meat. *don’t salt it yet. salting before you cook meat is a good way to lose juice and flavor, or make the meat really tough, unless you are brining.

spread the apple slices onto the meat, then the spinach on top of that.

roll the tenderloin long way, so you have a long tube of meat, securing with string as you go along. tuck in all of the spinach and apples that sneak out.

pour the rest of the vinegar over the pork and set aside to marinate for an hour. pork should be at room temp for half an hour before cooking. throw onto the grill, indirect heat, for half an hour or so. let it rest for 10 minutes before sprinkling with salt and pepper. cut string off and serve.

butternut squash with toasted walnuts and crisped bacon

serves 8

ingredients

1 medium butternut squash

few sprigs rosemary, trimmed and chopped

knob of butter

salt and pepper

1/4 cup whole milk (or heavy cream for a special treat)

2 tbsp brown sugar

5 strips cooked bacon, crumbled

1 cup walnuts, chopped

method: preheat oven to 450f. rinse the outer skin of the squash and dry. with a sharp knife, cut down the squash lengthwise. smear the flesh with butter. sprinkle with rosemary, salt, and pepper. place onto greased cookiesheet, flesh side down, and roast for 40 minutes or so. you’ll know it’s done when the skin is brown and papery. you should be able to pierce it easily with a dull knife. don’t be alarmed if the flesh is black around the edges. this is a special treat. the starches in the squash cook into a nice, deeply flavored sugary crust. try to include this into the puree.

while squash is cooling, over low heat, toast the walnuts until they become just fragrant. these burn easily, watch it.

set nuts aside to cool.

once squash is done, set aside to cool for half an hour or so. now scoop the flesh out from the skin into a large bowl or kitchen aid bowl. the papery skin may try to cling onto the flesh, so you should use care in doing this.

pour milk or cream over squash and add brown sugar. whip with mixer until well mixed and smooth. taste it. -here is where you can add some more cream, salt, pepper, or brown sugar.

scoop into a pretty bowl and sprinkle bacon and nuts over top. a little butter melting on top doesn’t hurt, either.

i’ll now include my recipe for apple upside down cake, though i’ve posted it before on this blog. i’ve adjusted the recipe slightly, as has the author of the original recipe over at comfy belly. the previous cake contained a lot of liquid, so i’ve cut out the butter from the cake batter and used thicker yogurt to further reduce the water content. i really like this mildly sweet cake, and it’s become a seasonal regular in our house. use tart apples for maximum flavor. i served it with maple whipped cream, but it would be great with vanilla ice cream, or maybe a small glass of bourbon. what? don’t be a square.


apples upside down


apple upside down cake

2 cups almond flour, packed

pinch of salt

1 tsp baking soda

2 eggs

1/2 cup plain greek yogurt

1 tsp vanilla

1/3 cup honey

3 tart apples, cored & sliced

1 tsp cinnamon

2 tbsp brown sugar

method:

preheat oven to 300f. prep spring form or regular 9″ cake pan with butter and round of parchment.

in large skillet, saute thinly sliced apples in a little butter and cinnamon for 5 minutes or so, until they are just tender. -you don’t want to over cook them, remember they will cook a little while baking, too. remove from heat and place in a pretty pattern on parchment. i did spirals patterns, trying to close the gaps so the batter wouldn’t seep through much. don’t pour the tasty syrup into the pan, you’ll only have a soggy cake. sprinkle brown sugar over the apples and stick pan into the freezer while you prep the cake.

meanwhile, combine dry ingredients, breaking clumps from the almond meal.

separately, mix wet ingredients. be sure the eggs are well beaten into the batter to ensure an even and smooth batter.

combine wet and dry together.

pour the batter over the apples.

bake for 40 minutes on middle rack of oven.

you’ll know when it is done by using toothpick test, and cake is not jiggly when you give it a tap.

let it cool in the pan for at least an hour. i usually let it cool for a few hours so the syrup from the fruit sets up before i invert it.


lemon & thyme roasted vegetables

my mother-in-law, cindy, has a great abundance of herbs growing on her ever hip rooftop garden. every time we see her, she’s handing us bags and bags of basil, oregano, thyme, etc. i would never ever turn down fresh herbs. i will always be able to find some way to “get rid” of these herbs for cindy. i’ve posted my recipe for lemon & thyme chicken on the grill before, and i wanted to share my recipe for the mushrooms and carrots that so well accompany this wonderful summer dish. (yes, we do have 3 days left of summer, so i can still be posting summer recipes!) thanks again for the freebies, cindy!

lemon & thyme roasted vegetables

1 lb carrots

1 lb mushrooms (i love crimini for this recipe)

1/2 lemon for juice

1/2 tsp lemon zest

1 tbsp fresh thyme cleaned from the stem

1 tbsp oil

S&P to taste

method: preheat oven to 475f. oil a large metal broiler pan.

put thyme and salt into large glass bowl. mash the salt into the leaves of the thyme. this will release their flavor in a similar way that bruising basil to make pesto works. let it set for a minute or 2 before adding the lemon juice. add the pepper and zest and stir well. let this sit for 10 minutes or so before using.

clean and chop carrots to desired size. i never peel my carrots, i scrub them with a brush to remove dirt. the “peel” retains a lot of flavor. halve or quarter mushrooms, depending on size.

throw veggies into lemon mixture and toss well. i like to let this sit for an hour or so before roasting.

pour olive oil onto veggies to coat liberally. don’t be afraid of using too much, olive oil is delicious. roast for 20 minutes or so, until veggies begin to brown. serve with more lemon zest if desired.

smores

we had a wonderful camping trip in michigan last week. we were in empire, near sleeping bear dunes. we ate like beasts. who gains weight on a camping trip? my weakness was nightly smores. -no, not one.. or two.. sometimes more than three. what? it’s vacation. i used my homemade marshmallows, homemade graham crackers, and a fatty smear of nutella. i can’t describe how incredible these were. it’s not even worth trying to tell, just believe me. i wasn’t sure how these would do in the fire. they were just a tad more delicate and toasted much faster than a store bought marshmallow, so we had to keep our eyes on them that they wouldn’t drip into the fire. oh, and the trick to a good smore is a black marshmallow, by the way.

vanilla cupcakes with dark chocolate frosting

we had a birthday party for me a few weeks ago.- a cookout, actually. we had wieners and baked beans. dear lord, what a wonderful meal. *josh, your beans are the bees knees.*

brian was in charge of my birthday treats, and i had chosen coconut milk ice cream with a toppings bar (i had coconut, chocolate chips, almonds, and strawberries on mine!) and vanilla cupcakes with dark chocolate frosting. this is a really amazing recipe that i adapted from elana’s pantry. the cupcakes are really versatile. in fact, it’s the recipe i used for margarita cupcakes a few months back. the frosting is very rich and decadent, and makes enough to frost a whole cake or a dozen high-hat cupcakes. we’ve used it for many cake recipes, but i think it’s my favorite on these vanilla cupcakes. though i couldn’t call it complicated to make, there are a few steps in making this frosting. but it’ll come to ya!

the cupcakes are really fluffy and moist. my friends complimented us on the texture numerous times. i’ve heard along the way that this can be made into a cake, but haven’t tried it myself. if you attempt this, please let us know if it works in cake form! this recipe makes 12 cupcakes.

vanilla cupcakes

ingredients:

1/2 cup coconut flour

1/2 tsp salt

1/4 tsp baking soda

6 eggs

1/2 cup honey

1/2 cup olive oil

2 tbsp vanilla

method:

preheat oven to 350f. put racks in center of oven. place papers into cupcake tin.

whisk all dry ingredients together.

whisk all wet ingredients together.

with hand mixer or by hand, blend wet and dry ingredients together.

spoon batter evenly into paper-lined cupcake tin. batter will be very thin.

bake for 20 minutes, until center is no longer wet and jiggly. *cupcakes will have a little shine on top of them, tricking you into thinking they are not done. they probably are done, so pull ’em out! these are easy to over bake!

cool completely before frosting.

dark chocolate frosting

ingredients

1 cup dark chocolate chips

1/2 cup olive oil

2 tbsp honey

1 tbsp vanilla extract

pinch of salt

method:

over low heat (i used double-boiler method), melt chocolate and oil, stirring frequently. once melted, stir in remaining ingredients.

place mixture into freezer for 15 minutes to thicken.

remove from freezer. using hand blender, whip mixture into thick, whippy frosting. it must be cold to do this, so if it’s not whipping up properly, place back into freezer for 10 minute increments until it is cold enough. i blended mine for 5-10 minutes. it was very fluffy and light.

scoop into pastry bag and pipe onto cupcakes, or simply smear onto cupcakes with spatula.

this frosting is also quite delicious when licking the bowl clean before placing into the dishwasher.

THANK YOU FOR AN AMAZING BIRTHDAY, FRIENDS!

zingers

zinger

we had brian’s parents over last weekend for dinner, mostly as a thank you for all they’ve done to help us move in. my parents had their turn the weekend before, so don’t feel badly for them! we have a grill now, which has already proven itself to be worth it’s weight in gold. we got a simple weber charcoal grill. we love the flavor of charcoal, and i can’t wait to get a smoking box for it. brian’s mom gifted us with a few toys for the grill: a vegetable basket and some nice long-handled grilling tools. so of course we had to grill their “thank you dinner”.

~a side note~ i wanted to give one last big thank you to brian’s and my parents for the ridiculously huge amount of help they’ve given us with moving into our new home. we couldn’t do it without you guys!

i made bacon-wrapped scallops, which brian and his dad grilled to perfection. the bacon was crispy, and the outer crust of the scallops were lightly charred while the inside was still soft and buttery. we had roasted fingerling potatoes with lemon zest and a salad of green beans and yellow zucchini with caesar dressing and pecorino. last week i discovered my hidden talent of whipping up a caesar dressing with no recipe, though i can roughly estimate the ingredient amounts:

roasted potatoes and warm caesar salad

caesar dressing:

1 egg yolk

1/8 cup olive oil

1/8 cup lemon juice

3 anchovy fillets

1 clove garlic, chopped

1 tbsp dijon mustard

1 tsp worcestershire sauce

s & p to taste

method: with immersion blender, puree all ingredients until completely liquid. pour over everything.


for desert, i made a clean version of hostess “zingers”. i’m not sure if you’ve ever had one of these (i haven’t had one in probably 20 years, or ever…) but they are a vanilla cake base filled with strawberry, and topped with marshmallow fluff and coconut. they are packed with horrible things that don’t even qualify as food, and the ingredient list scares the hell out of me. compared to the hostess brand, my zingers were spotless..

this version was obviously grain free. i used a recipe for jelly donut cupcakes from elana’s pantry, and the rest i winged. i filled them with strawberry jam instead of raspberry, topped them with strawberry jam and a thick dollop of whipped cream, and sprinkled them with coconut.

did they taste like zingers? i don’t know. like i said, it’s been a while. but they were amazing. so fluffy and light. they certainly rekindled my love affair with novelty desserts like this. these may look involved, but were fairly simple to make.

HINT: these would make a great father’s day treat.

zingers

fluffy, strawberry filled snowballs

ingredients for the cupcake batter:

3 eggs

1/2 cup applesauce (no sugar or crap added)

1/2 cup oil (i used olive)

1/2 cup honey

1 tbsp pure vanilla extract

1/2 cup coconut flour (sift it, please)

1/2 tsp salt

1/4 tsp baking soda

strawberry filling ingredients:

1/2 cup seedless strawberry jam

1 tbsp arrowroot powder

method: combine jam and arrowroot powder until completely dissolved. be sure there are no lumps or dusties lingering. set aside.

preheat oven to 350f and place racks in center of oven. prep muffin tin with paper liners- i use unbleached, non-stick papers. i’m sure whatever you use will be fine.

combine all dry ingredients in a bowl. i do this by sifting together. in a food processor, combine all wet ingredients until combined. be sure to scrape the bottom just in case any honey is sticking around down there on it’s own.

pour dry ingredients into processor with the wet and pulse until just combined. let it sit for 5 minutes or so.

spoon 2 tbsp batter into each cupcake paper, then 1 heaping tsp strawberry filling on top of the batter.

spoon one heaping tbsp batter on top of filling, being sure jam is completely covered. you don’t want any seepage.

bake for 30 minutes or so, until tops are golden brown. now, since you can’t test them with the toothpick test due to the filling, you’re going to think to yourself, “are these completely done?”. there is no easy answer to that question. just know that these suckers burn easily, and that they will set up a little after coming out of the oven.

once done, pull ’em out of the tins (GENTLY) and cool on a wire rack completely before topping, maybe 2 hours to be safe.

i topped them with another dollop of jam, then a huge thud of whipped cream, which i made, then sprinkling of coconut.

top these just before serving. they will not keep well frosted with whipped cream.

honey whipped cream

tasty mess

1/2 cup heavy whipping cream

3 tbsp or so honey

1 tsp vanilla

method: whip with blender or by hand until fluffy. don’t overdo it or you’ll make butter. (delicious butter….) eat out of the bowl or use as frosting. this kept for 4 days in the fridge before i ate it all.

sour lemon bars

my parents came to our new home for dinner last weekend. it was the first time we had entertained since moving in, and it went quite well! the plan was to keep food simple so we could focus on the visit. brian and dad had some yard work to do because we had a huge branch snap off of a peach tree. it was sad seeing a hundred or so peaches go to waste like that. it appears as though there will be plenty more later on this summer, though. the tiny grape sized fruits are already starting to blush from bright green to light yellow.

shrimp, asparagus, mushrooms, and potatoes

after the dudes were done playing with the saw in the back yard, we got on with the dinner. i made sautéed giant shrimp, mushrooms, and asparagus and  with a lemon pecorino sauce served over crispy roasted potatoes and bacon. it was delicious. in fact, it was so delicious i wish i were eating it right now.

for dessert i wanted to make something equally seasonal and fresh flavored, so i went with lemon bars. the recipe is based on one i found a few months ago on this website, which i visit daily. it had been on my mind for a few months now, but i knew i wanted to wait until spring for this fruity, sour treat. they were amazing, and super easy to make. the cookie crust was slightly lemony with a sweet, just nutty crunch. the lemon curd was perfect, and i can not brag enough about how well it turned out. all of the feedback i got was more than positive, except for my friend josh who announced that they were “lemony beyond lemony”, which could actually be a compliment by his standards.

this recipe is based on the one on nourishing gourmet. i did alter it, and the recipe shown below reflects my changes.

these are very user-friendly, so don’t let the curd scare you off. i would think anyone would have all of these ingredients on hand, and i’m certain the recipe could be toyed around with for fun and fancy versions.. i’m thinking strawberry curd? crumb topping? roll with it, people.

the curd should be made after the base is cooling, otherwise the curd will soak into the base.

sour lemon curd on a sweet cookie base

sour lemon bars

ingredients for the bars:

1 cup almonds

1 cup cashews

1/4 cup honey

1/4 cup melted  coconut oil (butter could be used)

2 eggs

1 tsp sea salt

1 tsp lemon zest

method:

preheat oven to 400f. place racks in center of oven. prep 9 x 9 glass baking dish by coating with butter or oil.

combine melted coconut oil, honey, eggs, and zest in a large bowl with a whisk until well combined.

in food processor, combine nuts and salt together until they form a dry, crunchy flour. not too long, or you will form a nut butter.

add in liquid ingredients and pulse a few times until it is just combined. don’t forget to scrape the bottom of the processor bowl to blend in any ingredients that may cling to it.

pour batter into baking dish, bake for 12-18 minutes. -until edges become golden brown. i like to use clear glass when baking so i can watch the bottom for burning, too. a toothpick inserted into the center should come out fairly clean with a few crumbs sticking to it.

cool for at least a few hours before pouring in curd.

ingredients for the curd:

3 eggs

1/3 cup honey

zest of one organic lemon

1/2 cup of lemon juice

6 tbsp coconut oil or butter

method:

whisk first 3 ingredients in a sauce pan over low heat, until light in color. remember, you don’t want to be making scrambled eggs here, so low and slow is the key here.

add coconut oil, whisk for a few seconds until melted, then whisk in lemon juice.

cook over medium heat whisking constantly, until mixture thickens and a few bubbles rise from the mixture.

remove from heat immediately after you see your first few bubbles, and pour through a fine sieve into a clean bowl, pushing mixture through. discard pulp in sieve.

stir the curd that is now in the bowl. allow it to cool for just a few minutes before pouring over cooled lemon bars.

let it all sit in the fridge for a few hours to set up. cut into bars. you can make many, or a few. i served them huge for my family, then cut the leftovers into itsy-bitsies to serve them at a party the next day.

curd will get stiff in the cold, but will gel pretty soon after sitting at room temp for a while. -so be careful with how you store them. they taste best straight out of the refrigerator, but are amazing any way you serve them. i declare that they would make an excellent, healthy breakfast choice.